
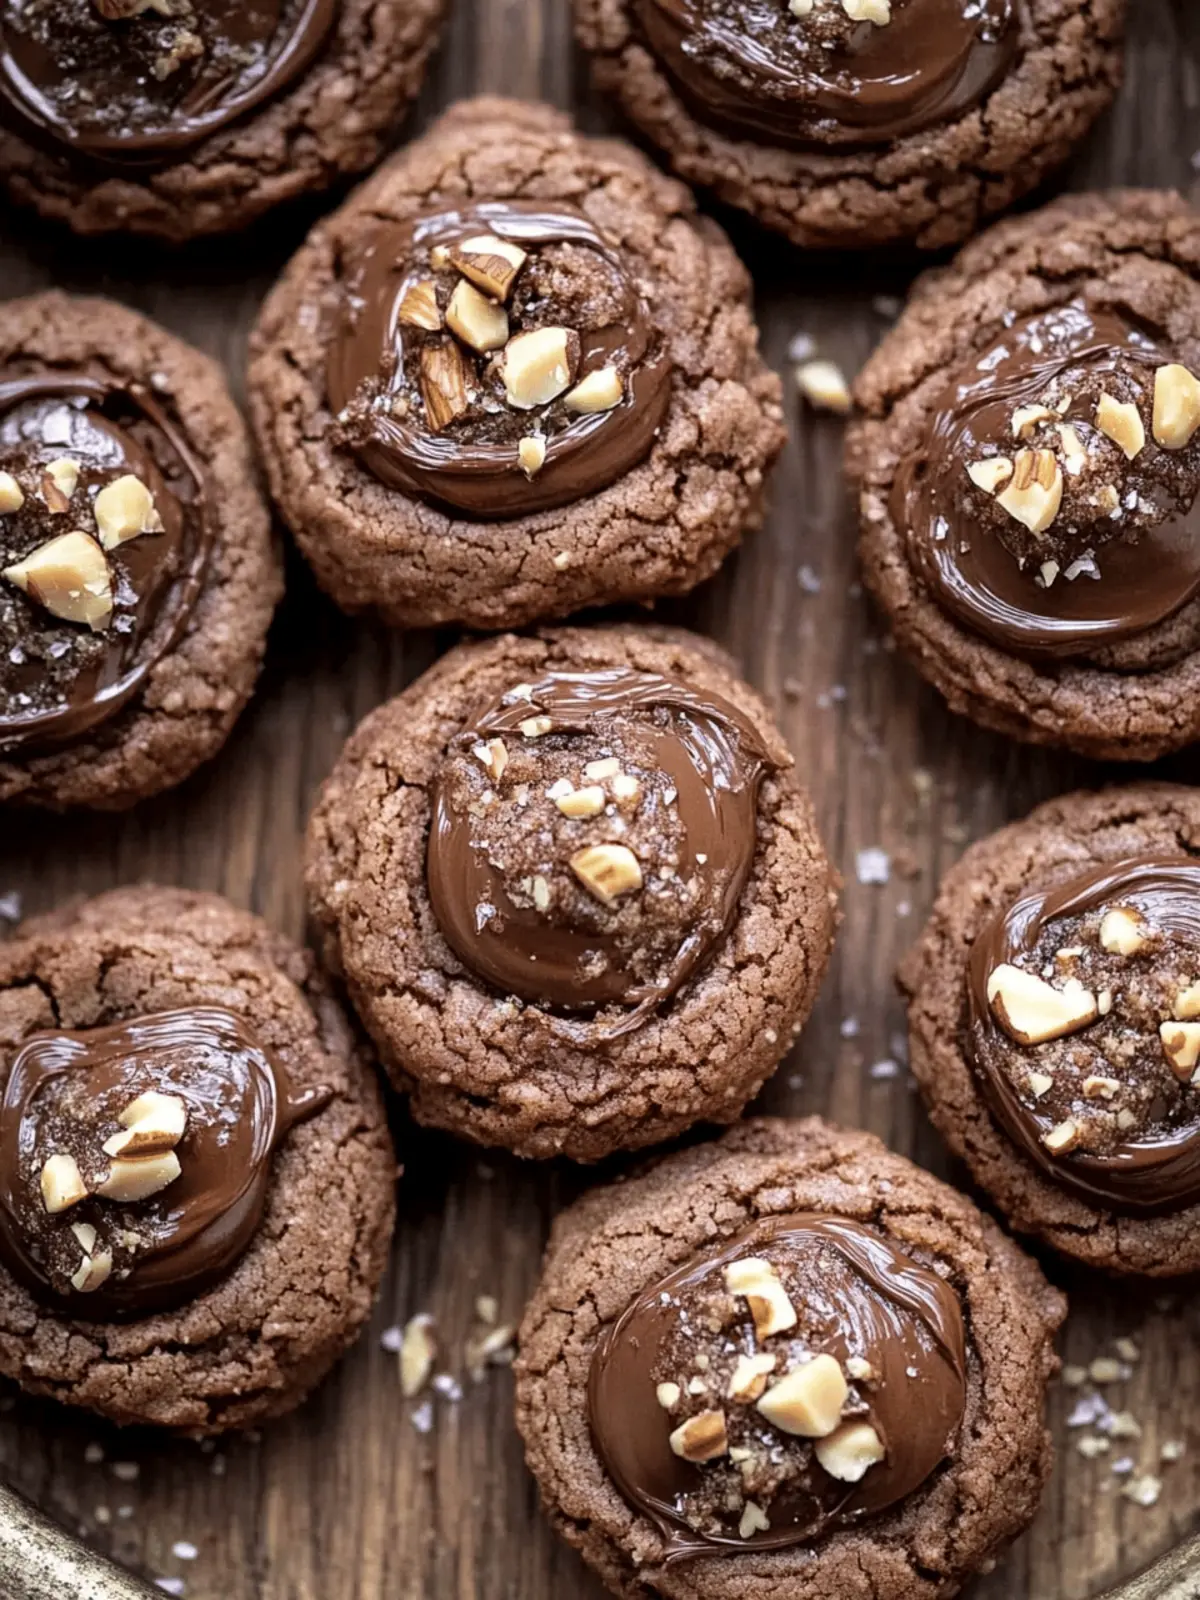
Chocolate Hazelnut Thumbprint Cookies That Bring Joy
Last Updated on March 13, 2026 by Miguel
When the craving for a sweet treat strikes, nothing satisfies quite like the irresistible combination of chocolate and hazelnuts. One rainy afternoon, while rummaging through my pantry, I unearthed a jar of chocolate-hazelnut spread—my heart leaped with excitement at the thought of creating something delightful. That’s when these Chocolate Hazelnut Thumbprint Cookies were born!
What I love most about this recipe is its balance; a rich, cocoa-infused cookie serves as the perfect backdrop for a gooey dollop of Nutella, topped with crunchy toasted hazelnuts. Each bite offers a delightful contrast between the soft, chewy cookie and the luscious filling, making them a crowd-pleasing dessert for gatherings or simply indulging at home. As someone who enjoys homemade food over fast food, I assure you that whipping these cookies up will be an adventure worth taking. Plus, they come together in just a few simple steps—ready in under 20 minutes! Let’s dive in and bake a batch that will leave your kitchen smelling heavenly.

How will you enjoy Chocolate Hazelnut Thumbprint Cookies?
Heavenly combination: The rich chocolate and nutty hazelnut flavors create an irresistible treat, perfect for any dessert lover.
Crowd-pleaser: Ideal for gatherings, these cookies will impress friends and family with their gorgeous appearance and delightful taste.
Quick and easy: With just a handful of ingredients, you can whip up a batch in under 20 minutes, making them a hassle-free indulgence.
Unique textures: Enjoy the contrast of the soft, chewy cookie against the gooey Nutella center and crunchy hazelnut topping.
Homemade goodness: Forget fast food—this recipe brings the joy of homemade treats straight to your kitchen.
Chocolate Hazelnut Thumbprint Cookies Ingredients
For the Cookie Dough
• All-purpose flour – 1 ½ cups (187.5 g) provides the structure for these rich, chewy cookies.
• Dutch-processed cocoa powder – ½ cup (60 g) adds a deep chocolate flavor that will satisfy any sweet tooth.
• Kosher salt – ½ teaspoon enhances the sweet notes and balances the flavors beautifully.
• Baking powder – ½ teaspoon helps the cookies rise to that perfect chewy texture.
• Unsalted butter – ¾ cup (1 ½ sticks / 170 g), at room temperature, ensures a creamy and smooth dough.
• Light brown sugar – ¾ cup (150 g), packed, contributes a lovely caramel-like richness to the cookies.
• Granulated sugar – ¼ cup (50 g) adds sweetness and a light crispness to the edges of the cookies.
• Egg yolks – 2 large, at room temperature, provide richness and stability to the dough.
• Vanilla extract – 2 teaspoons offer a fragrant note that elevates the overall flavor profile.
For the Filling
• Chocolate-hazelnut spread – ¾ cup (222 g), divided, is the star ingredient that makes these cookies truly unforgettable.
For Garnish (Optional)
• Chopped hazelnuts – ¼ cup, finely chopped and toasted, add an incredible crunch that complements the soft cookie perfectly.
These Chocolate Hazelnut Thumbprint Cookies are destined to become your new favorite treat! Dive into baking, and enjoy the sweet aroma that fills your kitchen!
How to Make Chocolate Hazelnut Thumbprint Cookies
Preheat: Start by preheating your oven to 350°F (175°C). Prepare two baking sheets by lining them with parchment paper, ensuring a non-stick surface for your cookies.
Whisk Dry Ingredients: In a medium bowl, whisk together the all-purpose flour, Dutch-processed cocoa powder, kosher salt, and baking powder. This mix will add structure and chocolatey goodness to your cookie dough.
Beat Butter: In a large mixing bowl, use a hand mixer or stand mixer with the paddle attachment to beat the unsalted butter until it’s smooth and creamy. This usually takes about 1-2 minutes.
Mix Sugars: Add the light brown sugar and granulated sugar to the butter. Beat on medium speed until the mixture is light and fluffy, which should take about 2-3 minutes.
Incorporate Eggs and Vanilla: Add the egg yolks and vanilla extract to the butter-sugar mixture. Mix until everything is fully incorporated, rich and delicious!
Combine Wet and Dry Ingredients: Gradually add the dry mixture to the wet ingredients in two parts. Mix on low speed until the dough just comes together—it should be creamy and slightly thick, but don’t overmix!
Form Dough Balls: Scoop out tablespoon-sized portions of the dough and roll them into smooth balls using your hands. Position them on the prepared baking sheets, leaving about 2 inches of space between each ball.
Create Indentations: With your thumb or the back of a ½ teaspoon measuring spoon, gently press an indentation into the center of each dough ball. This is where the Nutella will sit!
Bake Cookies: Place the trays in the preheated oven and bake for 10-12 minutes. The edges should be set while the center remains soft. If the indentations puff during baking, press them gently back down as soon as you take them out.
Cool Cookies: Allow the cookies to cool on the baking sheet for 5 minutes. Then, carefully transfer them to a wire rack to cool completely.
Add Nutella Filling: Once cool, spoon a generous teaspoon of Nutella into the center of each cookie, creating that luscious topping we all crave!
Garnish: While the Nutella is still soft, sprinkle chopped toasted hazelnuts over the top to give an extra crunch and flavor kick.
Set and Serve: Let the Nutella filling set before serving or storing, ensuring it’s perfectly delightful when you finally enjoy them!
Optional: Drizzle extra melted chocolate on top for an indulgent touch!
Exact quantities are listed in the recipe card below.
What to Serve with Chocolate Hazelnut Thumbprint Cookies?
Elevate your dessert experience with perfect pairings that complement the rich, chocolatey goodness of these delightful cookies.
- Fresh Fruit Salad: Bright, juicy fruits bring a refreshing contrast that balances the sweetness, making each bite feel lighter and more vibrant.
- Vanilla Ice Cream: Creamy vanilla ice cream provides a rich, smooth texture and coolness that perfectly contrasts the warm cookies.
- Espresso or Coffee: A bold cup of espresso or coffee enhances the chocolate flavors, creating a cozy and indulgent experience with every cookie.
- Chocolate Milkshake: For a playful twist, pair these cookies with a thick chocolate milkshake, satisfying both your taste buds and nostalgic cravings simultaneously.
- Whipped Cream Topping: Light and airy whipped cream adds a delightful richness, making each bite of the cookie feel extra luxurious.
- Toasted Hazelnuts: Sprinkle more toasted hazelnuts on top or alongside for an added crunch that matches the cookie’s texture.
- Molten Lava Cake: For a dessert extravaganza, serve these cookies alongside a warm molten lava cake; the combination of textures and flavors is simply divine!
- Hot Chocolate: On a chilly evening, a cup of steaming hot chocolate pairs beautifully, creating a warm hug of comfort with the cookies.
- Bourbon or Dark Rum: For an adult twist, serve with a glass of bourbon or dark rum, enhancing the nutty and chocolatey notes within the cookies.
- Molasses Cookies: The spices and chewy texture of molasses cookies create a wonderful contrast, giving your dessert spread delightful variety.
Make Ahead Options
These Chocolate Hazelnut Thumbprint Cookies are perfect for busy home cooks looking to save time! You can prepare the cookie dough up to 24 hours in advance. Simply follow the recipe instructions until you’ve formed the dough balls; then wrap them tightly in plastic wrap and refrigerate. When you’re ready to bake, take them out, create the indentations, and continue with the baking steps. Additionally, you can fill the cookies with Nutella and garnish with hazelnuts up to 3 days ahead. Just ensure they’re stored in an airtight container to maintain their freshness. This way, you can enjoy warm, homemade cookies whenever the craving strikes!
Chocolate Hazelnut Thumbprint Cookies Variations
Feel free to explore these delicious twists that will perfectly tailor your cookies to your taste!
- Nut-Free: Substitute the hazelnuts with finely chopped crispy rice or sunflower seeds for a nut-free version.
- Vegan: Replace the butter with a plant-based alternative and use flax eggs in place of the egg yolks for a delightful vegan treat.
- Gluten-Free: Use a 1:1 gluten-free baking flour blend to keep all the tasty flavors while accommodating gluten sensibilities.
- Cocoa Boost: Add a splash of espresso powder alongside the cocoa powder for a deeper, richer chocolate flavor.
- Spiced Up: Mix in a pinch of cinnamon or cardamom to the dough for a warm, spiced twist that’ll elevate each bite.
- Dark Chocolate: Substitute the Nutella with dark chocolate ganache for an even richer filling option that chocolate lovers will adore.
- Minty Fresh: Add a few drops of peppermint extract to the dough for a delightful minty flavor that pairs perfectly with chocolate.
- Fruity Addition: Fold in some dried cherries or cranberries into the dough for a tangy sweetness that complements the rich flavors beautifully.
Experiment and find your perfect version of these delightful Chocolate Hazelnut Thumbprint Cookies!
Storage Tips for Chocolate Hazelnut Thumbprint Cookies
Room Temperature: Store cooled cookies in an airtight container at room temperature for up to 3 days to maintain their soft texture.
Fridge: If you want to keep them a bit longer, refrigerate the cookies in an airtight container for up to a week, but be aware they may lose some of their chewiness.
Freezer: For longer storage, freeze the cookies in a single layer, then transfer them to a freezer-safe bag or container. They can be frozen for up to 3 months.
Reheating: To bring back that fresh-baked taste, you can warm the cookies in the oven at 350°F (175°C) for a few minutes, or microwave for about 10 seconds.
Expert Tips for Chocolate Hazelnut Thumbprint Cookies
- Room Temperature Ingredients: Make sure your butter and egg yolks are at room temperature for a smoother dough and better blending of flavors.
- Avoid Overmixing: Mix the dough just until it comes together; overmixing can lead to tough cookies instead of the desired chewy texture.
- Indentation Technique: If your indentations puff up while baking, gently press them down immediately after removing from the oven to retain that signature thumbprint shape.
- Nutella Portioning: Use a teaspoon to measure the Nutella for each cookie; this ensures you get the perfect gooey dollop without overwhelming the cookie.
- Optional Toppings: Feel free to elevate your cookies with a drizzle of melted chocolate on top for added indulgence!
Chocolate Hazelnut Thumbprint Cookies Recipe FAQs
What level of ripeness is best for the ingredients?
Absolutely! While there’s no specific ripeness needed for the ingredients in these Chocolate Hazelnut Thumbprint Cookies, it’s best to ensure that your butter is soft (but not melted) and your egg yolks are at room temperature. This helps create a smoother dough and better texture in your final cookies.
How should I store leftover cookies?
To ensure your cookies stay fresh, store them in an airtight container at room temperature for up to 3 days. If you’re looking to extend their shelf life, you can refrigerate them for up to a week, but they’ll lose some of their delightful chewiness.
Can I freeze these cookies?
Very! Freezing is a great option. To freeze, first cool the cookies completely. Then, lay them in a single layer on a baking sheet. Once frozen, transfer them to a freezer-safe bag or container. They can be stored in the freezer for up to 3 months. When you’re ready to enjoy them, just thaw at room temperature or reheat them in the oven for a few minutes at 350°F (175°C).
What should I do if my cookies spread too much while baking?
Great question! If your cookies spread during baking, it could be due to a few factors. Make sure your butter isn’t too soft; it should be room temperature but still hold some shape. Using cold egg yolks can also help. If they spread regardless, try chilling your dough for about 30 minutes before shaping and baking. This helps them hold their shape better.
Are there any dietary considerations I should know about?
Enjoying these cookies can be a delightful experience for most! However, if you have nut allergies or are serving anyone with dietary restrictions, be sure to substitute the hazelnuts with another topping like crushed graham crackers or simply skip them altogether. Also, check that your chocolate-hazelnut spread is free from allergens if necessary!
Can these cookies be made vegan or gluten-free?
Absolutely! For a vegan version, substitute unsweetened applesauce for the egg yolks and use a plant-based butter alternative. As for making them gluten-free, swap in a cup-for-cup gluten-free flour blend, ensuring it contains xanthan gum for better binding. Enjoy your baking adventure!