
Savory French Dip Squares: Effortless Comfort for Sharing
Last Updated on March 13, 2026 by Miguel
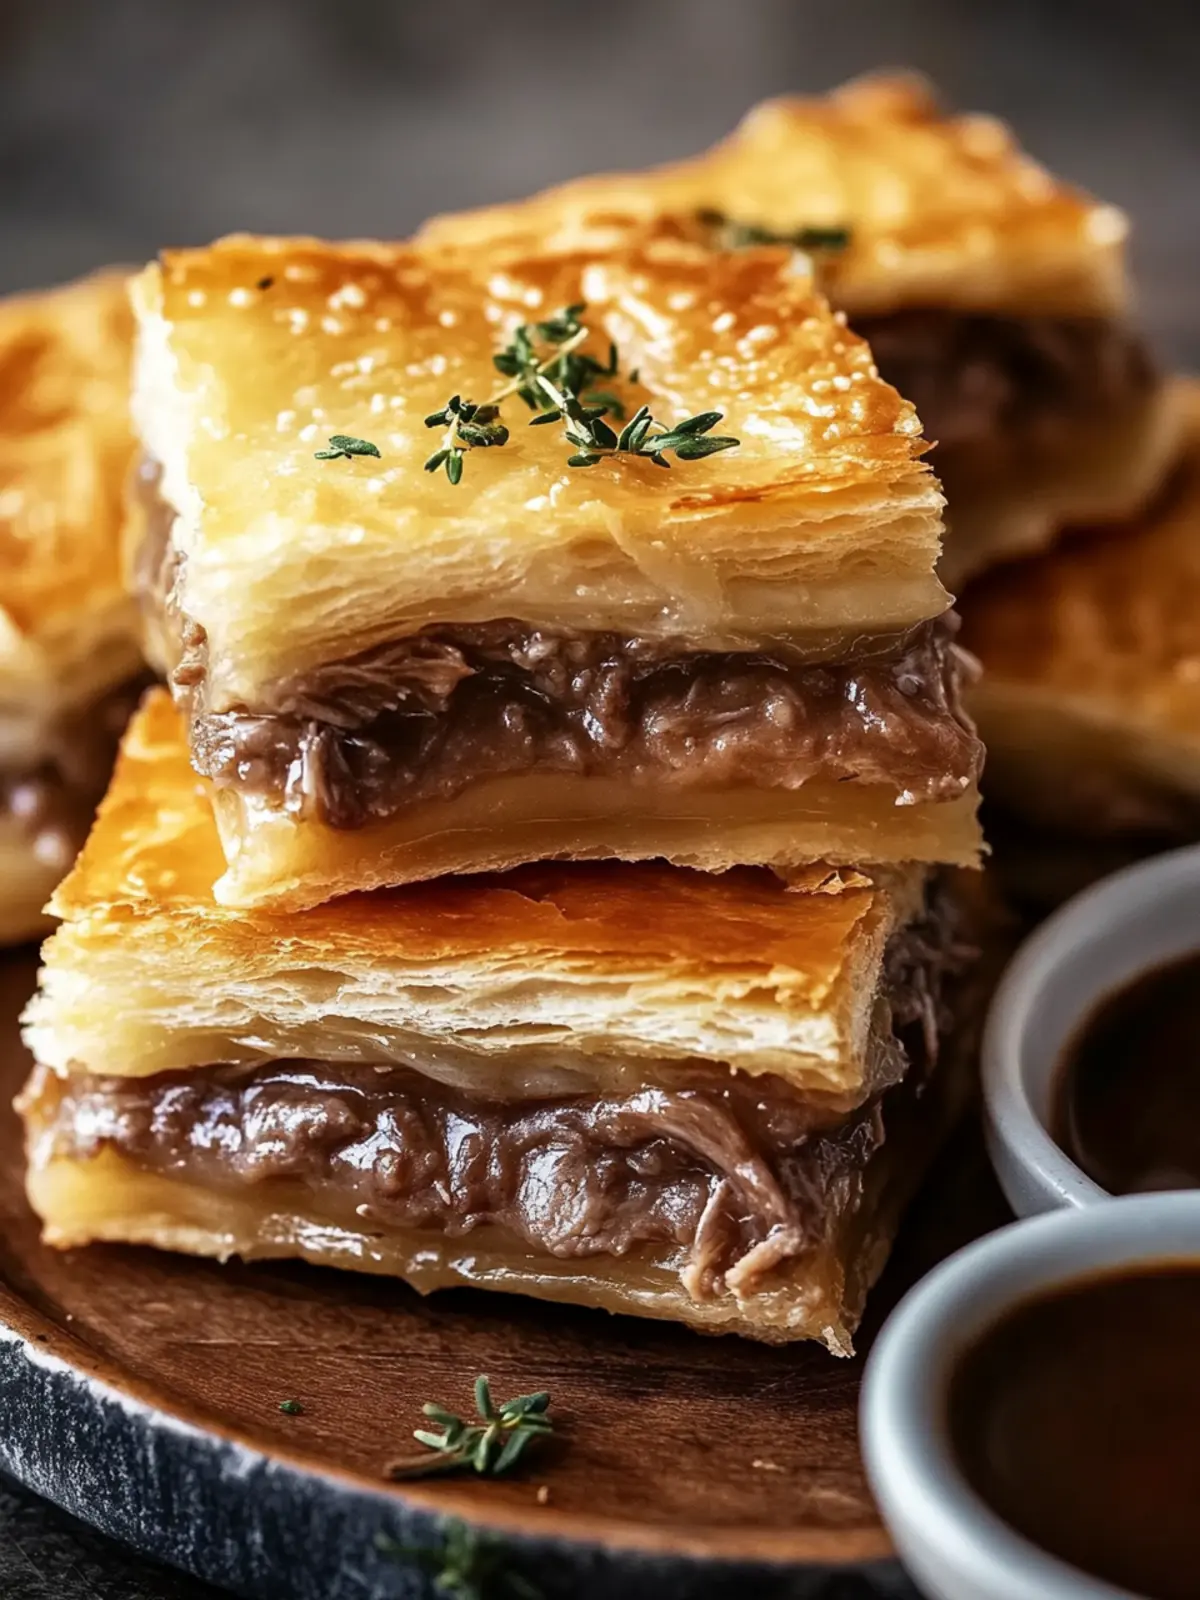
There’s nothing quite like the thrill of gathering around a warm, inviting dish that brings everyone together, and these French Dip Squares do just that! Imagine the comforting aroma of savory roast beef mingling with the nutty scent of melted Swiss cheese, all encased in a buttery, flaky crust. This delightful casserole turns the classic French Dip sandwich into a shareable masterpiece that’s perfect for potlucks, family dinners, or even a cozy night in.
What caught me by surprise was how easy it is to whip up this crowd-pleaser—minimal prep time and unforgettable flavor make it a staple in my kitchen. With each square, you get a satisfying bite of tender meat paired with a rich beef broth for dipping, reminiscent of the traditional experience. Plus, it’s versatile enough to switch up the ingredients to suit your taste, whether you opt for turkey, ham, or a blend of cheeses. Join me in making this enticing dish that promises to steal the show at your next gathering!
Why are French Dip Squares a must-try?
Simplicity makes this recipe a breeze, letting you impress guests with minimal effort.
Irresistible flavors combine savory roast beef and creamy Swiss cheese, creating a mouthwatering experience.
Versatile options allow you to mix up meats and cheeses for your unique twist.
Quick assembly means you can have this dish ready in no time—perfect for busy weeknights!
Comfort food charm makes it an instant favorite, ensuring everyone will be coming back for seconds.
Serve it with a light green salad for a delightful meal that truly satisfies!
French Dip Squares Ingredients
• Here’s what you’ll need for these delightful French Dip Squares.
For the Crust
- Refrigerated Crescent Rolls – These create a buttery and flaky crust that’s super easy to handle and bake.
For the Filling
- Deli Roast Beef – The star ingredient! Choose thinly sliced for easy layering and maximum flavor.
- Swiss Cheese – Melts beautifully and adds a nutty richness that complements the beef.
- Dry Onion Soup Mix – A flavor powerhouse that enhances the savory notes throughout the dish.
- Butter – Adds richness and helps bind the flavors together during baking.
- Worcestershire Sauce – Infuses a savory umami depth that elevates the overall flavor profile.
- Garlic Powder – A pinch adds that extra something to make the dish pop.
For Dipping
- Beef Broth – Serve warm for a dipping sauce that brings the traditional French Dip experience to life!
How to Make French Dip Squares
Preheat the oven to 375°F (190°C). Get your 9×13 inch baking dish ready by spraying it with non-stick cooking spray, ensuring an easy release after baking.
Roll out one can of crescent roll dough evenly across the bottom of the prepared dish. Pinch the seams closed to create a single layer, ensuring no gaps for the filling to escape.
Layer deli-sliced roast beef evenly over the dough, making sure every inch is covered. Then, sprinkle a generous amount of grated Swiss cheese on top, creating a flavorful base for your squares.
Mix together the dry onion soup mix, melted butter, Worcestershire sauce, and garlic powder in a bowl. Drizzle this savory mixture over the cheese layer for an extra punch of flavor.
Unroll the second can of crescent roll dough and carefully place it over the filling, pinching the seams once again to seal everything in tightly.
Bake the dish in the preheated oven for 15-20 minutes, or until the top is golden brown and fully cooked. Keep an eye on it to avoid over-browning.
Heat the beef broth in a small pot on the stove while your squares are baking. This will be the perfect dipping sauce and replicates the traditional French Dip experience!
Cool for about 5-10 minutes once you take the dish out of the oven. This will help the layers set, making it easier to cut into squares.
Serve your French Dip Squares warm, accompanied by a cup of the heated beef broth for an unforgettable dipping experience.
Optional: Garnish with fresh parsley for a pop of color and freshness.
Exact quantities are listed in the recipe card below.

How to Store and Freeze French Dip Squares
Fridge: Store leftover French Dip Squares in an airtight container for up to 3 days. This keeps the flavors intact and allows for quick reheating when needed.
Freezer: For longer storage, you can freeze the squares for up to 2 months. Wrap them tightly in plastic wrap or aluminum foil and place them in a freezer-safe bag.
Reheating: When ready to enjoy, thaw in the fridge overnight. Reheat in the oven at 350°F (175°C) for about 15-20 minutes until warmed through, ensuring the crust remains crispy.
Assemble Ahead: You can also prepare the dish in advance and refrigerate unbaked for up to 24 hours. Pop it in the oven when you’re ready to serve—convenient and delicious!
Expert Tips for French Dip Squares
Seal the Seams: Ensure the crescent roll seams are well-pinned together; this prevents the filling from leaking during baking and keeps your French Dip Squares intact.
Watch the Bake: Monitor your baking closely to avoid over-browning. If the top is cooking too quickly, tent it with foil to allow the center to cook through without burning.
Cool Before Cutting: Allow the dish to cool for about 5-10 minutes after baking. This helps the layers set and results in cleaner cuts when you slice into squares.
Try Different Meats: Feel free to swap the deli roast beef for turkey or ham! This variation still creates delightful French Dip Squares while catering to different preferences.
Add Extra Flavor: Consider adding caramelized onions or sautéed mushrooms for additional depth. These flavors wonderfully complement the existing savory notes of the dish.
What to Serve with French Dip Squares?
Elevate your dining experience with delightful accompaniments that enhance every savory bite of these irresistible squares.
- Crispy French Fries: A classic pairing, their salty crunch complements the soft, cheesy filling beautifully.
- Coleslaw: The freshness and tang of a crunchy coleslaw provide a refreshing contrast to the rich flavors of the dish.
- Garlic Bread: For extra buttery comfort, garlic bread makes a delicious side for dipping and soaking up savory broth.
- Caesar Salad: The creamy dressing and crisp romaine offer a light touch that balances the hearty nature of the casserole.
- Roasted Vegetables: A medley of roasted seasonal veggies adds warmth and flavor complexity, enhancing your overall meal.
- Pickles or Pickled Veggies: Their sharp and tangy notes cut through the richness of the beef and cheese, providing a zesty bite.
- Fruit Salad: A sweet and refreshing fruit salad brings a burst of brightness and contrasts nicely with the savory squares.
- Red Wine: A nice, full-bodied red enhances the savory depth while adding a touch of sophistication to your meal.
- Iced Tea or Lemonade: A glass of sweet iced tea or tangy lemonade can complement the flavors and keep things refreshing.
- Chocolate Brownies: Finish with dessert! Rich chocolate brownies provide a luscious ending to the savory meal, making it truly memorable.
Make Ahead Options
These French Dip Squares are a fantastic choice for meal prep, allowing you to save precious time on busy weeknights! You can assemble the dish up to 24 hours in advance. Simply prepare the entire recipe (steps 1 through 5) and cover it tightly with plastic wrap before refrigerating. This keeps the crust from drying out and flavors melding beautifully. When you’re ready to bake, just pop it in the oven directly from the fridge, adding an extra 5 minutes to your baking time for best results. Alternatively, bake the squares, let them cool, and then refrigerate or freeze for up to 3 days or 3 months respectively. Reheat in the oven for that fresh-out-of-the-oven taste. Enjoy these delightful French Dip Squares with minimal effort!
French Dip Squares Variations
Feel free to play around with these variations and make this dish uniquely yours!
Turkey Twist: Substitute deli roast beef with sliced turkey for a lighter option that still delivers delicious flavor.
Cheese Swap: Experiment with provolone or cheddar cheese to create your favorite cheesy profile—each offers a different flavor and melt.
Mushroom Medley: Add sautéed mushrooms for an earthy depth that perfectly complements the meat and cheese combination.
Caramelized Onions: Include some caramelized onions for a sweet, savory contrast that takes these squares to the next level.
Spicy Kick: Stir in some horseradish or Dijon mustard with the beef for a kick that brings unexpected yet delightful heat.
Herbed Harmony: Incorporate fresh herbs like thyme or rosemary into the filling for a fragrant lift—definitely a new twist on classic flavors!
Gluten-Free Option: Use gluten-free crescent rolls as a base to accommodate dietary needs while still enjoying the great taste.
Veggie Delight: Swap out meat entirely and fill the squares with a mix of roasted vegetables and cheese for a satisfying vegetarian option.
French Dip Squares Recipe FAQs
What type of meat is best for French Dip Squares?
Absolutely, deli roast beef works perfectly for this dish as it provides that tender, savory bite. However, you can also use turkey or ham as alternatives for a lighter option. Just remember to choose thinly sliced meats for easy layering and even cooking!
How should I store leftover French Dip Squares?
I recommend keeping any leftovers in an airtight container in the fridge for up to 3 days. This will help maintain the flavors and ensure they’re ready for a quick reheating whenever you crave a bite of that delicious casserole.
Can I freeze French Dip Squares?
Yes! You can freeze the squares for up to 2 months. Just wrap them tightly in plastic wrap or aluminum foil and place them in a freezer-safe bag. When you’re ready to enjoy, simply thaw overnight in the fridge.
What’s the best way to reheat frozen French Dip Squares?
To reheat, first, thaw the squares in the refrigerator overnight. Then, pop them in a preheated oven at 350°F (175°C) for about 15-20 minutes until they’re heated through. This will help ensure the crust stays crispy, just like the first time you made them!
How do I prevent leaking filling from the crescent rolls?
To prevent any leakage, it’s key to ensure that the crescent roll seams are well-pinned together. I’ve found that pinching the seams tightly before baking really helps to keep everything contained and intact, so you can enjoy each perfect square!
Can I prepare French Dip Squares in advance?
Definitely! You can assemble the dish up to 24 hours in advance. Just cover it tightly and refrigerate it before baking. When you’re ready to serve, bake it straight from the fridge for a delightful, fresh dish without any hassle.