Haunted Graveyard Pudding Cups That Wow at Any Halloween Party
Last Updated on March 13, 2026 by Miguel
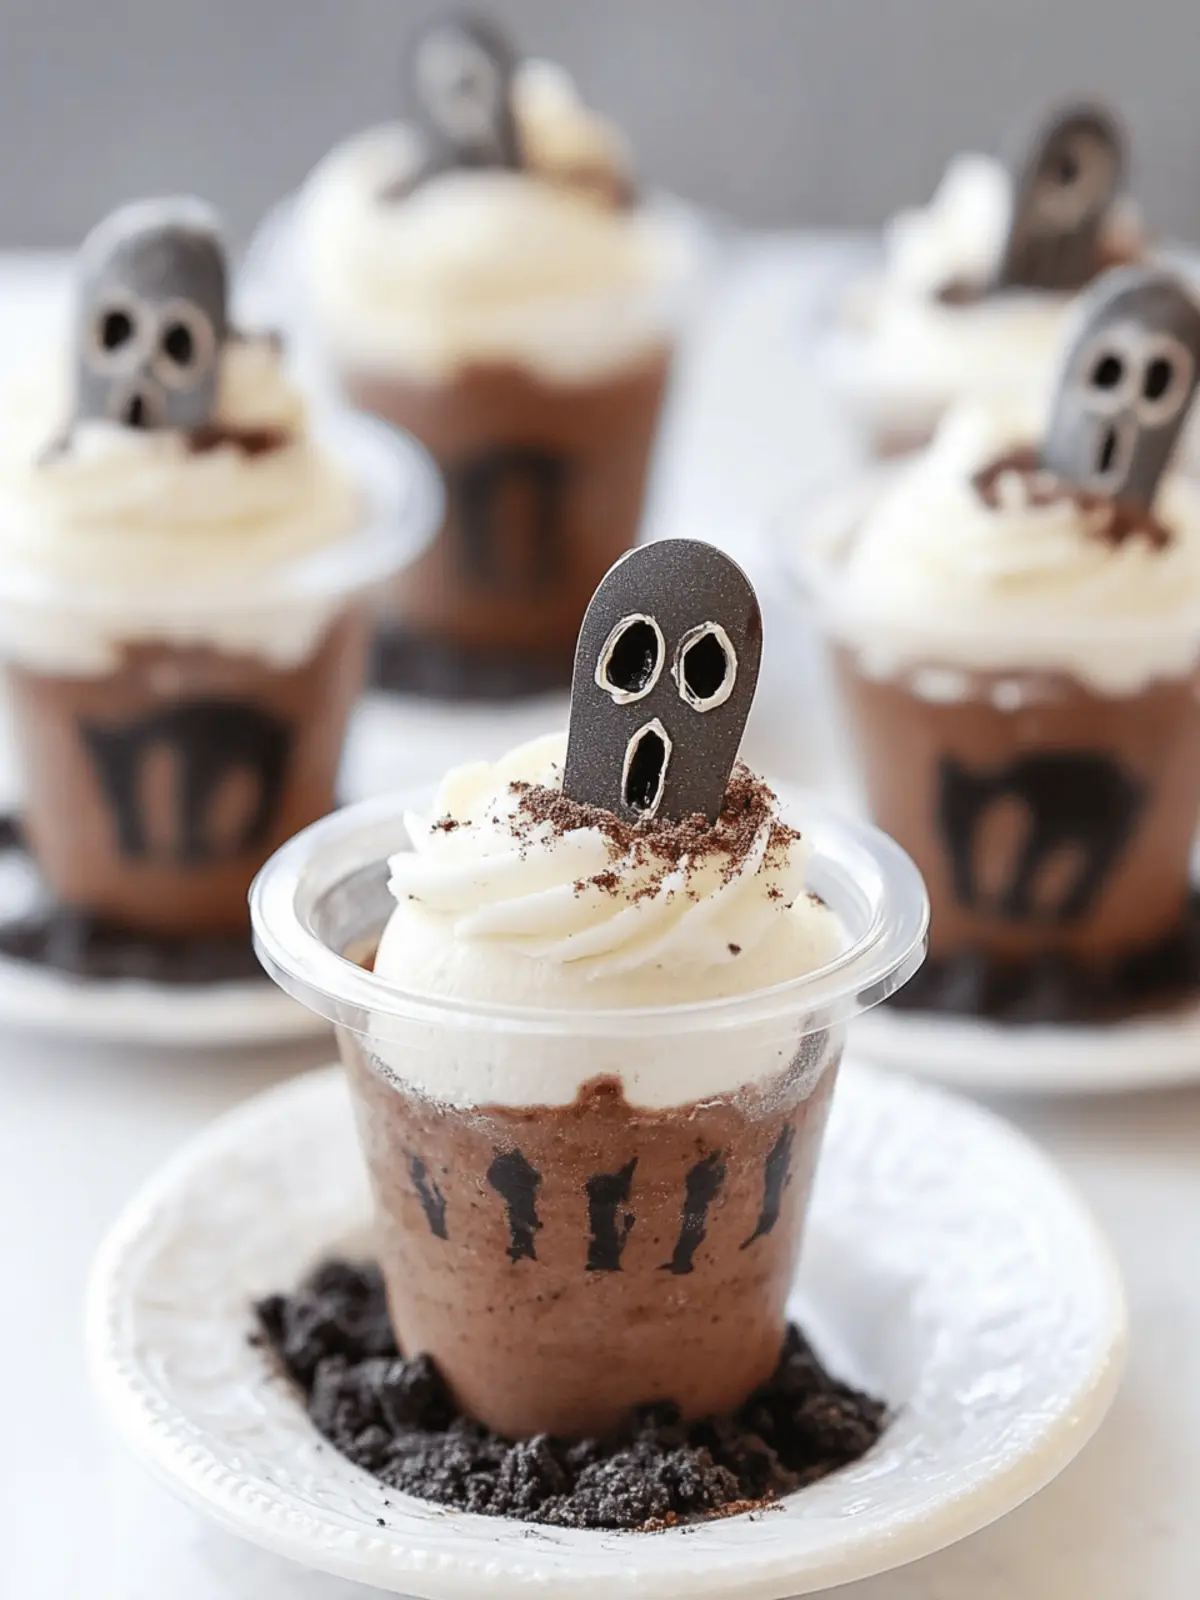
As the chill of autumn settles in and Halloween decorations begin to take shape, I can’t help but feel the excitement bubbling in my kitchen. These Haunted Graveyard Pudding Cups are not just any dessert; they’re a wickedly delightful blend of rich chocolate pudding, crushed Oreo “dirt,” and whimsical whipped cream ghosts that will enchant your family and friends. There’s something especially fulfilling about crafting a no-bake treat that brings joy, and these cups are the epitome of that warm, festive spirit.
I remember the first time I served these at a Halloween gathering—the sheer delight on my guests’ faces was priceless! With just a few simple ingredients and no need for baking, this treat allows you to focus on the fun of the season rather than the fuss of complicated recipes. Whether you’re planning a spooky soirée or just craving something sweet to liven up a crisp fall evening, these pudding cups promise to be a crowd-pleasing highlight. Get ready to layer, decorate, and indulge in a deliciously haunted experience!
Why are Haunted Graveyard Pudding Cups a must-try?
Delightful Surprise: These Haunted Graveyard Pudding Cups surprise with a spooky twist that’s perfect for Halloween celebrations.
No-Bake Simplicity: Quick to assemble, requiring no baking, making them an instant favorite for busy hosts.
Creative Fun: Personalize your dessert with various toppings like gummy worms or candy pumpkins for added flair.
Kid-Approved: Loved by both kids and adults, multiplying their crowd appeal at any gathering.
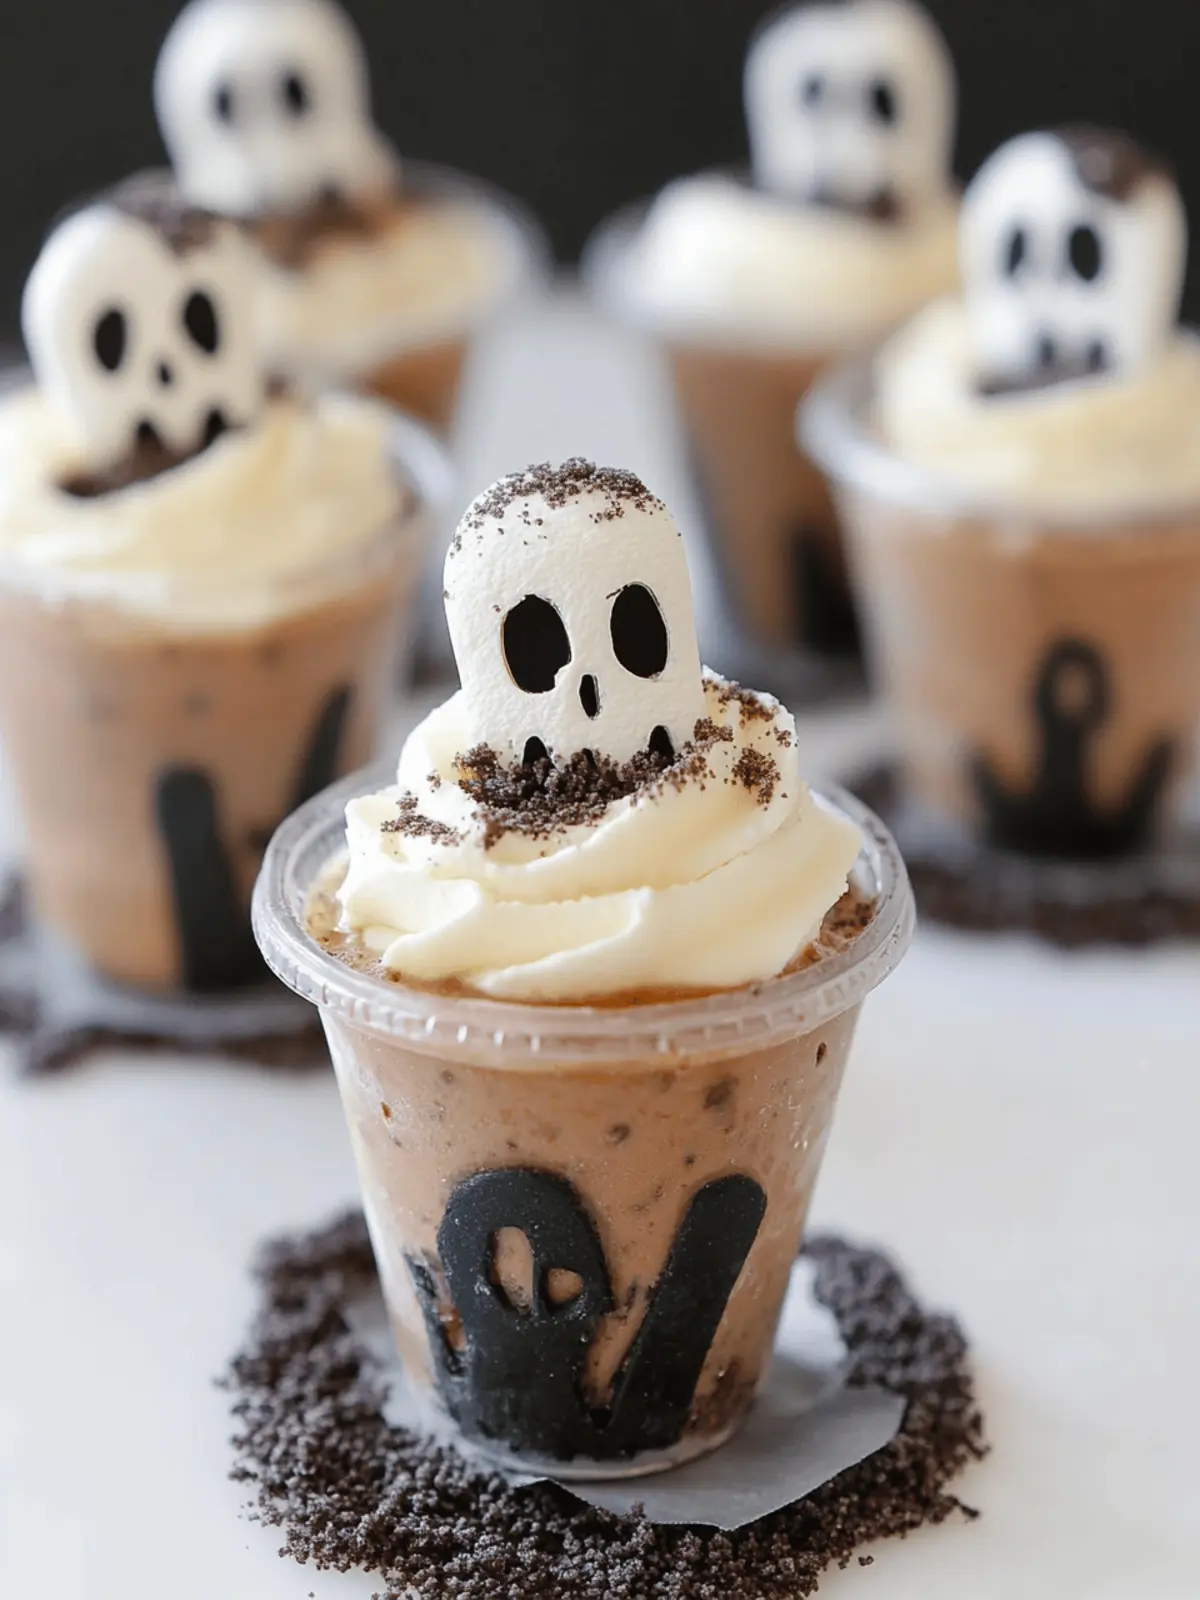
Visually Stunning: The contrast of creamy pudding, crunchy Oreo dirt, and playful whipped cream ghosts creates a dessert that’s as delightful to the eyes as it is to the taste buds!
Get ready to impress your guests with this festive treat that is sure to be a hit!
Haunted Graveyard Pudding Cups Ingredients
• Perfectly crafted for a spooky delight!
For the Pudding
- Instant Chocolate Pudding – This forms the rich, creamy base; feel free to switch it with vanilla or butterscotch for a different twist.
- Cold Water – Essential for activating the pudding mix; make sure it’s chilled for the best consistency.
- Sweetened Condensed Milk – Adds a deliciously rich sweetness; consider coconut milk for a dairy-free variation.
For the Whipped Cream
- Heavy Whipping Cream – Key for making fluffy ghostly shapes; try coconut cream for a non-dairy alternative.
- Powdered Sugar – Sweetens the whipped cream while helping it stabilize; reduce for a less sweet flavor.
For the Toppings
- Oreo Cookies – Crushed to create the necessary “dirt” layer; chocolate graham crackers make an excellent substitute if desired.
- Milano Cookies – These act as adorable tombstones; any suitable cookie can work here as a canvas for decorating.
- Edible Ink Marker or Chocolate – Use this for “R.I.P.” inscriptions on the tombstones; if you don’t have it, get creative with other decorations.
- Edible Candy Eyes – Perfect for giving life to your whipped cream ghosts; find them in the baking section.
- Optional Candy Decorations (like gummy worms or candy pumpkins) – Elevate your spooky theme with whimsical touches that children will love.
For Serving
- Clear Cups (6 – 8 ounces) – Ideal for layering your spooky treat and showcasing its whimsical appeal.
These Haunted Graveyard Pudding Cups are not just delicious—they are a feast for the eyes as well!
How to Make Haunted Graveyard Pudding Cups
Blend Ingredients: Combine chilled cold water, sweetened condensed milk, and instant chocolate pudding mix in a blender. Blend until smooth, then refrigerate for about 4-5 minutes, until set.
Whip Cream: Beat one cup of heavy whipping cream in a bowl until soft peaks form. Gently fold this whipped cream into the chilled pudding mixture, ensuring a light, airy texture.
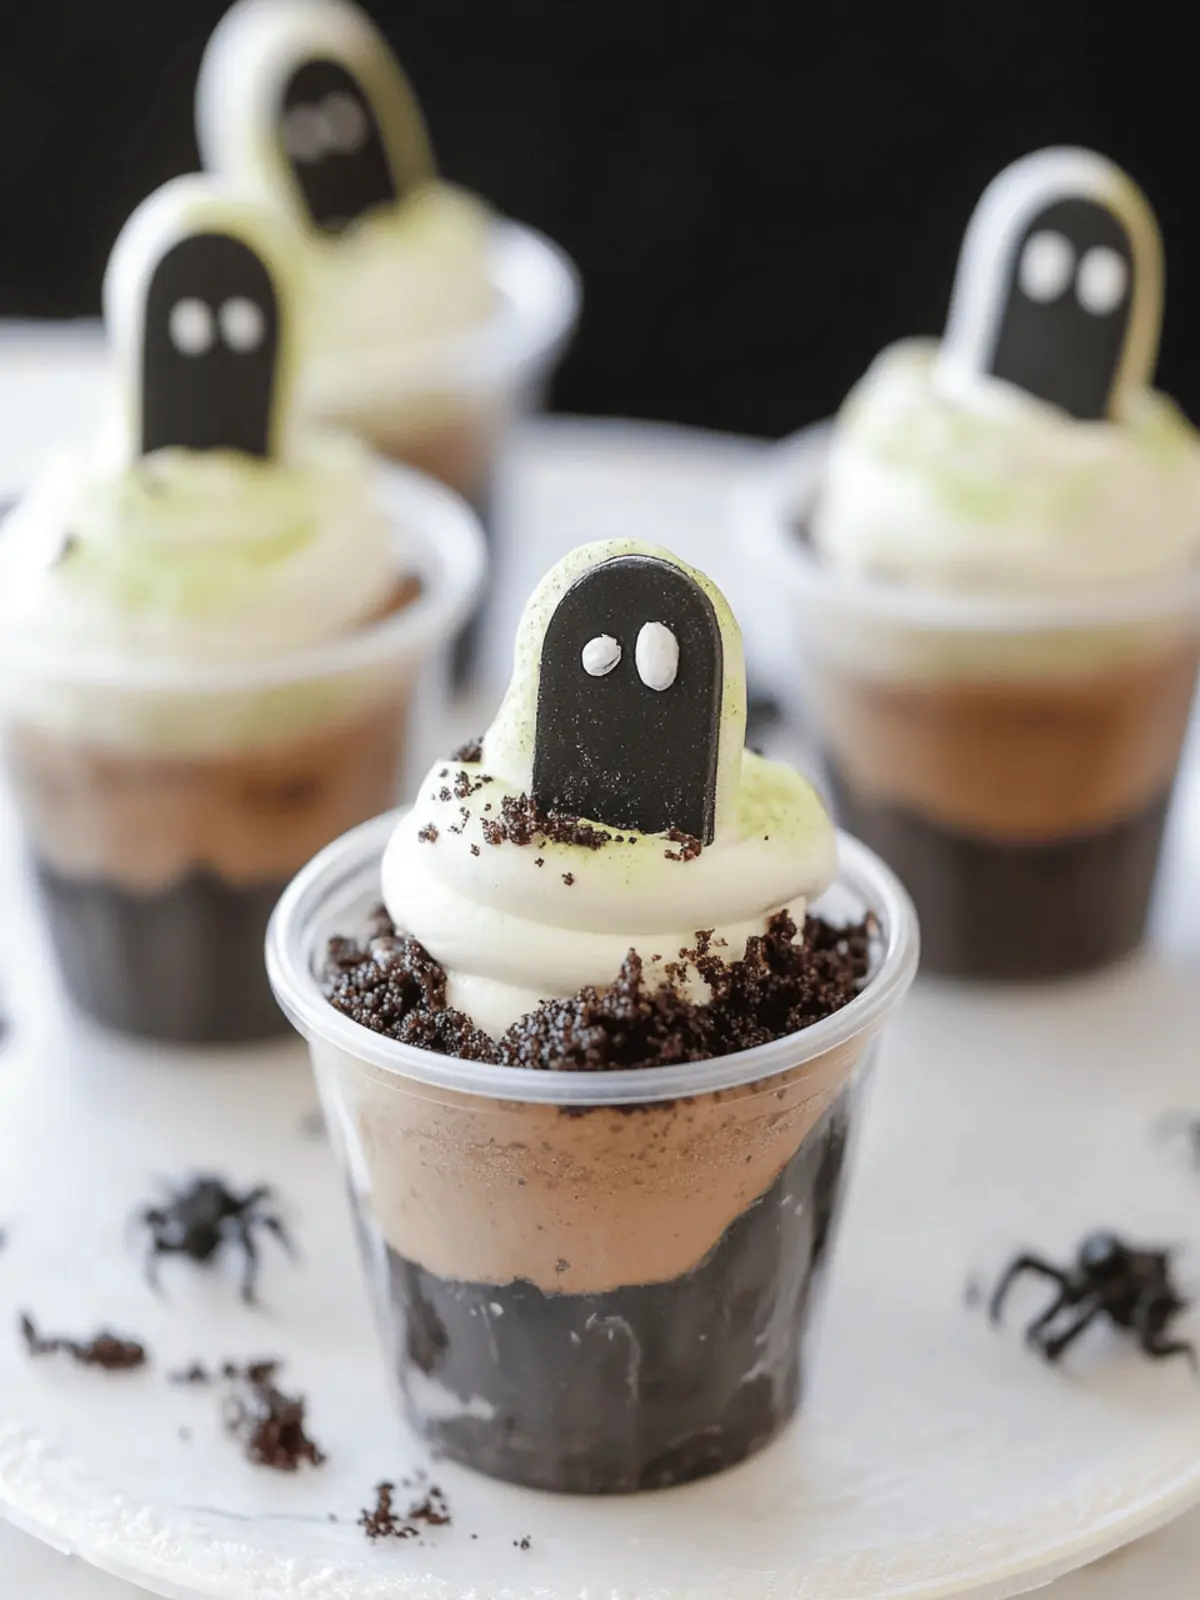
Distribute Mixture: Evenly spoon the pudding mixture into clear cups, filling each about three-quarters full, and refrigerate for up to 24 hours.
Crush Oreos: In a blender, crush Oreo cookies to create a crumbly “dirt.” Generously sprinkle this over the top of each pudding cup to simulate graveyard soil.
Decorate Tombstones: Take Milano cookies and use melted chocolate or an edible ink marker to write “R.I.P.” on them. Place one cookie tombstone in each pudding cup for a spooky touch.
Pipe Whipped Ghosts: In another bowl, beat the remaining heavy cream with powdered sugar until stiff peaks form. Use a piping bag to create ghost shapes over the pudding, topping each ghost with candy eyes.
Add Decorations: Finally, feel free to sprinkle optional candy decorations like gummy worms or candy pumpkins on top before serving, adding an extra festive flair!
Optional: For an extra spooky effect, use colored frosting for the ghosts or mix in gummy worms during layering.
Exact quantities are listed in the recipe card below.
What to Serve with Haunted Graveyard Pudding Cups?
To create a complete Halloween-themed feast, consider pairing these whimsical treats with delicious options that enhance the spooky atmosphere.
Spider Web Breadsticks: These cheesy breadsticks, twisted into spider webs, bring a playful twist to your table while being great for dipping.
Pumpkin Soup: Its creamy texture and vibrant color make this seasonal favorite a comforting contrast to the sweet dessert, creating a warm balance.
Creepy Caprese Skewers: Skewered mozzarella balls and cherry tomatoes dressed as “eyeballs” provide a refreshing bite that contrasts with the rich chocolate pudding.
Mummy Mini Pizzas: These fun, easy-to-make mini pizzas will entice the little ones with their ooey-gooey cheese and wrapped-in-bacon mummies! Serve them hot alongside your dessert.
Witch’s Brew Punch: A bubbly, fruity punch with gummy worms floating on top will keep the fun flowing while complementing the sweetness of the pudding cups.
Chocolate-Dipped Ghost Strawberries: A sweet treat that mirrors your pudding cups—these ghostly strawberries are dipped in white chocolate and decorated for that extra festive charm.
Graveyard Tacos: Use purple tortilla chips as grave markers, filling them with a spooky mixture of beans and veggies, adding both crunch and a savory bite before dessert.
These pairings will elevate your spooky gathering, creating a delightful meal everyone will talk about even after Halloween is over!
Haunted Graveyard Pudding Cups Variations
Feel free to let your creativity shine while making these delightful pudding cups!
Dairy-Free: Substitute sweetened condensed milk and heavy cream with coconut milk and coconut cream for a tropical twist.
The rich flavor of coconut adds a delightful new depth to your ghosts, making them a favorite for all ages!Alternative Cookies: Use chocolate graham crackers instead of Oreos for a slightly different texture.
These subtly sweet crackers can create a nice “dirt” layer that will surprise your guests with a unique flavor.Pudding Flavor Swap: Try vanilla or butterscotch pudding instead of chocolate for a fresh taste twist.
It’s incredible how changing the base can take these cups from spooky to sweet in a heartbeat!Spicy Kick: Add crushed red pepper flakes or cayenne pepper to the whipped cream for an unexpected layer of heat.
This surprising spice will add a fun, adult-friendly twist to your ghoulish dessert!Extra Toppings: Sprinkle in crushed candy corn or edible glitter for an added festive sparkle.
These little touches can elevate the spooky aesthetic and create a visually delightful dessert!Themed Decoration: Employ seasonal candy such as gummy eyeballs or witch hats for a fun Halloween spin.
These themed decorations will engage everyone, making your pudding cups the talk of the party!Layering Fun: Mix in gummy worms or other fun candies inside the pudding layers for a creepy surprise.
Imagine the joy on kids’ faces when they discover these hidden treats nestled among the layers!Gluten-Free Option: Substitute gluten-free cookies for Oreos to accommodate dietary restrictions.
It’s effortless to make these fun pudding cups accessible to all your guests, ensuring everyone can enjoy a sweet bite!
Make Ahead Options
These Haunted Graveyard Pudding Cups are a fantastic choice for busy cooks looking to streamline their Halloween festivities! You can prepare the pudding mixture and distribute it into clear cups up to 24 hours in advance, ensuring they remain deliciously chilled in the refrigerator. To maintain the whipped cream’s texture, whip it fresh and pipe ghost shapes right before serving; this keeps them light and airy. Additionally, you can crush the Oreos and prepare the Milano cookies with “R.I.P.” decorations ahead of time, storing them in an airtight container (and adding them just before serving). This way, your dessert is ready to impress with minimal effort, letting you enjoy the festivities!
How to Store and Freeze Haunted Graveyard Pudding Cups
Fridge: Keep your pudding cups covered in the refrigerator for up to 3 days. It’s best to add decorations just before serving to prevent them from becoming soggy.
Freezer: While not ideal for this dessert, if you need to freeze the pudding without toppings, they can be stored for up to 1 month. Thaw in the fridge overnight before serving.
Reheating: There’s no reheating needed for these Haunted Graveyard Pudding Cups. Enjoy them chilled for the best taste and texture.
Tip: Preparing these cups ahead of time is a great stress-saver. Just remember to put on the finishing touches right before your spooky gathering!
Expert Tips for Haunted Graveyard Pudding Cups
Whipped Cream Precision: Ensure you don’t over-beat the whipped cream; it should be fluffy but still hold peaks to create perfect ghost shapes.
Layering Fun: Consider layering some gummy worms in the pudding for an extra surprise; just make sure they are evenly distributed for a creepy effect.
Chill Time: For best results, chill the pudding cups for at least 4 hours before serving; this helps the layers set nicely.
Decorate Last Minute: To keep the whipped cream ghosts fluffy and the cookie tombstones crisp, decorate right before serving to maintain their delightful texture.
Creative Substitutes: Feel free to mix things up with different pudding flavors; vanilla or butterscotch can create a unique twist on these Haunted Graveyard Pudding Cups.
Keep it Fresh: Store the cups covered in the refrigerator for up to 3 days, but add the decorations just prior to enjoying for the best experience.
Haunted Graveyard Pudding Cups Recipe FAQs
What type of chocolate pudding should I use?
Absolutely, you can use instant chocolate pudding mix for the best results. If you want to switch it up, consider using vanilla or butterscotch pudding for a unique twist that still pairs wonderfully with the other ingredients!
How long can I store the Haunted Graveyard Pudding Cups?
You can keep your pudding cups covered in the refrigerator for up to 3 days. I recommend adding the whipped cream ghosts and cookie tombstones just before serving to keep everything fresh and avoid sogginess.
Can I freeze the Haunted Graveyard Pudding Cups?
While these dessert cups aren’t ideal for freezing due to the whipped cream texture, you can freeze the pudding mixture (without toppings) for up to 1 month. Simply place it in an airtight container and thaw it in the refrigerator overnight before serving. When you’re ready, layer it with fresh whipped cream and decorations!
What if my whipped cream doesn’t hold its shape?
Very! If your whipped cream seems to lose its shape, it may be due to over-beating or not using enough powdered sugar, which helps stabilize it. Be sure to stop whipping as soon as you reach soft or stiff peaks. You can also add a stabilizer (like a bit of cornstarch) while whipping to ensure it holds up well.
Are there any dietary considerations for this recipe?
Absolutely, there are a few substitutions you can make! For a dairy-free option, try using coconut milk in place of sweetened condensed milk and coconut cream instead of heavy whipping cream. Always check for allergy-friendly cookies or avoid common allergens like nuts or gluten depending on your guests’ needs.
How can I decorate my Haunted Graveyard Pudding Cups creatively?
The possibilities are endless! While I’ve suggested using edible candy eyes and Milano cookies as tombstones, you can also add whimsical touches like gummy worms, sprinkles, or even chocolate spider decorations. Let your creativity shine, and have fun with it!
