
Homemade Glazed Orange Rolls That Brighten Any Breakfast
Last Updated on March 13, 2026 by Miguel
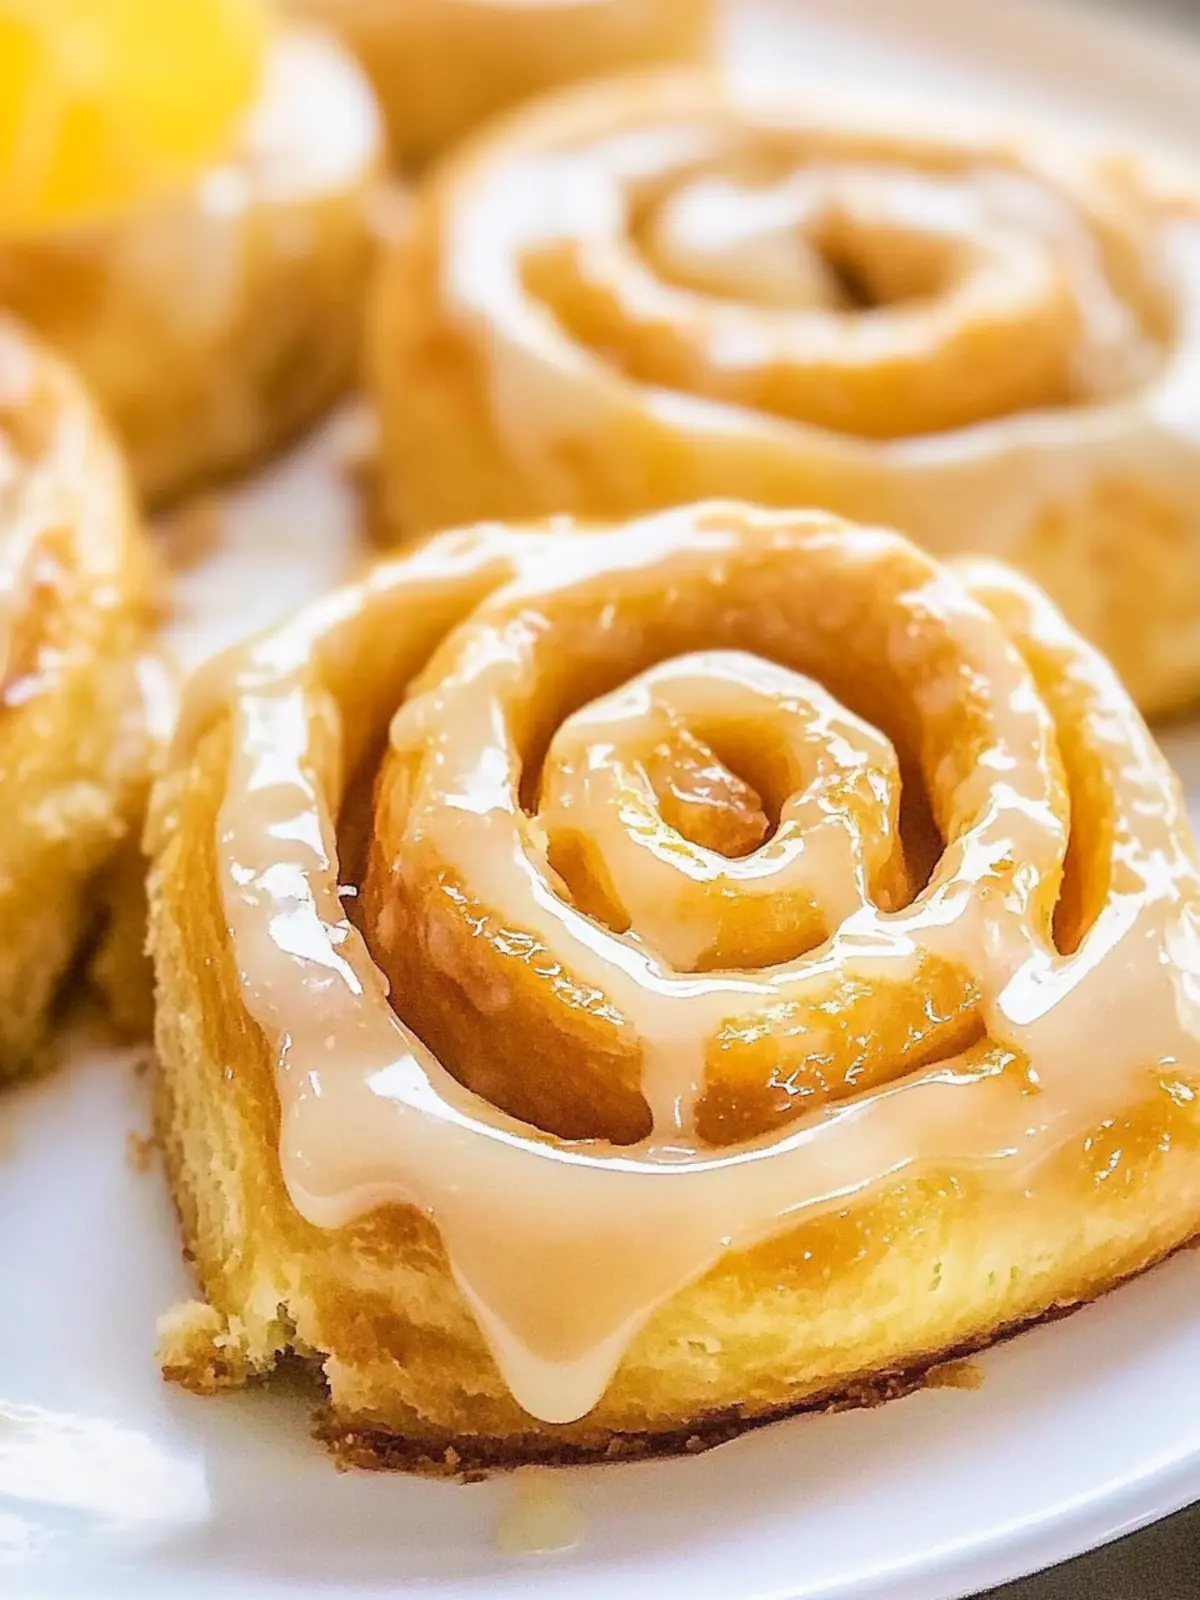
The moment the scent of freshly baked rolls wafts through the kitchen, it’s as if the sun has decided to rise just a little earlier to brighten my day. These homemade glazed orange rolls are more than just a pastry; they’re a little slice of sunshine that transforms breakfast into a celebration. Imagine biting into one of these fluffy delights, the zesty sweetness of orange filling your senses, perfectly complemented by a silky glaze that makes your taste buds dance with joy.
Whether you’re treating yourself on a cozy weekend morning, impressing guests during brunch, or simply indulging in a sweet midweek pick-me-up, these rolls are your new go-to. With hints of vibrant citrus flavor and the kind of melt-in-your-mouth texture that makes you feel like you’ve just discovered a bakery treasure, it’s time to trade in those fast-food runs for something homemade and heartwarming. Let’s dive into making these irresistible glazed orange rolls!

Why Are Homemade Glazed Orange Rolls so Special?
Delightful flavors shine through every bite with the refreshing essence of orange that elevates breakfast. Easy to make, even novice bakers can master these fluffy rolls with confidence. Perfectly versatile, you can enjoy them warm, with coffee, or even as a dessert. Impressive for gatherings, these rolls will wow guests at any brunch table. So why settle for store-bought when you can experience the joy of freshly baked goodness? Treat yourself to some homemade bliss with these delightful rolls, or try other options like make-ahead breakfast ideas for a seamless brunch experience!
Homemade Glazed Orange Rolls Ingredients
• For the Dough:
- Whole Milk – Provides moisture and richness; use warmed milk (110°F) for best yeast activation.
- Active Dry Yeast – Essential for leavening; ensure it’s fresh for optimal rise.
- Granulated Sugar – Adds sweetness and aids yeast activation.
- Eggs – Contributes to richness and structure; room temperature eggs mix more easily.
- Unsalted Butter – Adds flavor and moisture; melted for mixing and softened for spreading.
- Salt – Balances sweetness and enhances flavor.
- All-Purpose Flour – Forms the dough structure; adjust quantity based on dough consistency.
• For the Filling:
- Orange Zest – Infuses the filling with vibrant citrus flavor; fresh zest preferred for the best taste.
• For the Glaze:
- Powdered Sugar – Sweetens and thickens the glaze for a smooth finish.
- Fresh Orange Juice – Adds tanginess to the glaze; avoid bottled juice for optimal flavor.
With these ingredients, you’re just a step away from creating your own batch of homemade glazed orange rolls that radiate sunshine in every bite!
How to Make Homemade Glazed Orange Rolls
Mix the Yeast: In a mixing bowl, combine warmed milk and granulated sugar; sprinkle the active dry yeast on top. Let it sit for about 5–10 minutes until it becomes foamy—this means your yeast is active and ready to work its magic!
Combine Ingredients: Add in the eggs, melted unsalted butter, and salt to the yeast mixture. Mix on low speed, gradually incorporating all-purpose flour until a soft dough forms. Knead the dough for about 8–10 minutes until it’s smooth and elastic.
First Rise: Place your dough into a greased bowl, cover it with a cloth, and let it rise in a warm area for 1–2 hours, or until it has doubled in size. This step is crucial for achieving fluffy rolls!
Prepare the Filling: In a small bowl, mix softened butter, granulated sugar, and fresh orange zest together until creamy. This fragrant filling will infuse the rolls with delightful citrus flavor.
Shape the Rolls: Once your dough has risen, roll it out into a rectangle (approximately 16×12 inches). Spread the orange filling evenly over the surface, then roll the dough tightly from one long edge to the other, pinching the seam to seal.
Cut & Second Rise: Cut the rolled dough into 12 equal pieces. Arrange them in a greased pan, cover, and let them rise for another 30–45 minutes, until puffy and swollen.
Bake to Perfection: Preheat your oven to 350°F (175°C). Bake the rolls for 25–30 minutes, or until they are golden brown and irresistible. Your kitchen will smell divine!
Make the Glaze: While the rolls are baking, whisk together powdered sugar, fresh orange juice, and a bit of orange zest for the sweet glaze. After the rolls cool for a few minutes, drizzle the glaze generously over the warm rolls.
Optional: Serve warm with fresh fruit or a hot cup of coffee for the ultimate breakfast treat.
Exact quantities are listed in the recipe card below.
Make Ahead Options
These Homemade Glazed Orange Rolls are ideal for meal prep, saving you precious time in the morning! You can prepare the dough and shape the rolls up to 24 hours in advance by refrigerating them overnight after cutting. To maintain their quality, cover the rolls tightly with plastic wrap to prevent drying out. When you’re ready to bake, allow the rolls to rise at room temperature for about 30-45 minutes before popping them in the oven. If you have leftovers, simply store them in an airtight container for up to 4 days and reheat before serving to enjoy that fresh-baked feel, all while keeping your mornings stress-free!
Homemade Glazed Orange Rolls Variations
Feel free to get creative and spin your own twist on these delicious rolls with these fun options!
Dairy-Free: Substitute plant-based milk and vegan butter to make these rolls suitable for a dairy-free diet. Enjoy the same fluffy texture without the dairy!
Citrus Swap: Replace orange zest with lemon or lime zest for a refreshing new flavor profile. The zesty brightness will bring a delightful twist to your rolls.
Chocolate Orange: Add mini chocolate chips to the filling for a decadent chocolate-orange flavor combination that elevates these rolls to dessert status!
Nutty Addition: Stir in chopped walnuts or pecans into the filling for a satisfying crunch that complements the silky glaze perfectly.
Spiced Variation: Incorporate cinnamon or nutmeg into the dough or filling for a warm, spiced flavor that enhances the sweetness of the orange. A pinch of spice makes everything nice!
Glaze Options: Try a cream cheese frosting or vanilla icing instead of the orange glaze for a different, creamy texture that adds extra richness.
Fruity Twists: Add diced fresh fruit, like cranberries or blueberries, into the filling for a fruity surprise inside and a burst of flavor.
Heat Things Up: Sprinkle a bit of cayenne pepper into the glaze for a unique spicy-sweet kick that will thrill your taste buds!
Customize these rolls to your heart’s content and enjoy the endless possibilities that can brighten your breakfast table!
Expert Tips for Homemade Glazed Orange Rolls
Fresh Yeast Matters: Always ensure your active dry yeast is fresh and within its expiration date. This helps your dough rise beautifully and yields fluffy rolls.
Perfect Temperature: Warm your milk to about 110°F before mixing it with yeast. Too hot or cold milk can hinder yeast activation, leading to dense rolls.
Kneading Technique: Knead the dough thoroughly for 8–10 minutes to develop the gluten, which is key for getting those soft, airy homemade glazed orange rolls.
Patience is Key: Allow adequate rising time for your dough—it should double in size. Rushing this step can lead to tough, uneven rolls.
Zest for Flavor: Use fresh orange zest for the best flavor infusion. Bottled juice or dried zest removes the vibrant essence that makes these rolls special.
Adjust Baking Time: Every oven varies, so start checking for doneness around the 25-minute mark. The rolls should be golden brown and sound hollow when tapped.
How to Store and Freeze Homemade Glazed Orange Rolls
Fridge: Store leftover rolls in an airtight container for up to 4 days. They’ll maintain their delightful texture and flavor while tucked away.
Freezer: To freeze, wrap each roll tightly in plastic wrap and place them in a freezer-safe bag. They can last up to 2 months and still taste fresh when reheated.
Reheating: For the best experience, reheat rolls in the oven at 350°F (175°C) for about 10 minutes until warmed through. A gentle oven refresh will revive the fluffy texture of your homemade glazed orange rolls.
Make-Ahead: You can prepare and shape the rolls a day in advance, refrigerate overnight, and bake them fresh in the morning for a seamless breakfast treat.
What to Serve with Homemade Glazed Orange Rolls?
Elevate your breakfast experience with delicious sides that perfectly complement the bright, citrusy flavors of these homemade delights.
- Fresh Berries: Juicy strawberries or tart raspberries add a refreshing contrast to the sweetness of the rolls while enhancing the overall brunch aesthetic.
- Creamy Greek Yogurt: A dollop of plain or honey-infused Greek yogurt provides a protein boost, balancing the sweetness and creating a delightful, creamy texture when paired together.
- Crispy Bacon: The salty, smoky flavor of crispy bacon contrasts beautifully with the sweet orange glaze, making for a savory and sweet indulgence that everyone will love.
- Hot Coffee or Tea: A steaming cup of freshly brewed coffee or fragrant tea not only warms the soul but also complements the zesty orange flavors, making every bite even more enjoyable.
- Fruit Salad: A colorful mix of seasonal fruits brings brightness to the table and offers a light, refreshing palate cleanser alongside the richness of the rolls. A blend of textures and tastes.
- Nutty Granola: Sprinkling some crunchy granola adds a satisfying texture contrast while maintaining the breakfast vibe—perfect for those who crave something hearty alongside their roll.
- Vanilla Ice Cream: For a fun twist, serve a warm roll with a scoop of vanilla ice cream. The cold creaminess melting onto the roll creates a decadent dessert-like experience.
Mix and match these pairings to create a breakfast that’s full of flavor, warmth, and love!

Homemade Glazed Orange Rolls Recipe FAQs
How do I choose ripe oranges for the glaze?
Absolutely! When selecting oranges, look for those that feel heavy for their size and have a bright, vibrant skin. Avoid any with dark spots or wrinkles, as these may indicate overripeness. For the best flavor, choose fresh, juicy oranges rather than those that are dull or hard.
How should I store leftover glazed orange rolls?
Leftover rolls can be stored in an airtight container at room temperature for up to 4 days. If you live in a particularly warm climate, it’s best to keep them in the refrigerator to maintain freshness. Just be sure to let them come back to room temperature or warm them slightly before enjoying them again!
Can I freeze homemade glazed orange rolls?
Very! To freeze, wrap each roll tightly in plastic wrap and then place them in a freezer-safe bag. They can be frozen for up to 2 months. To enjoy them again, simply unfreeze them overnight in the fridge and reheat in the oven at 350°F (175°C) for about 10 minutes until warmed through—this will help restore their fluffy texture.
What if my dough doesn’t rise properly?
No worries, it happens! Ensure your yeast is fresh; if skeptical, you can test it by mixing it with warm water and a little sugar—if it becomes foamy after 5-10 minutes, it’s good to go! If your dough still doesn’t rise, check if the environment is warm enough; a cold area can slow down the rising process. Try placing the dough in a warm spot, like an oven that’s turned off but has the light on, or cover it with a warm, damp towel.
Are these rolls suitable for vegetarians or those with allergies?
Yes! These homemade glazed orange rolls are vegetarian. However, if you have dietary restrictions or allergies, consider using plant-based milk and butter to make them dairy-free. Always check all ingredients (like the powdered sugar) for possible allergens, and feel free to substitute where necessary to match your dietary needs.