
Irresistibly Chewy Peanut Butter Bars for Sweet Nostalgia
Last Updated on March 13, 2026 by Miguel
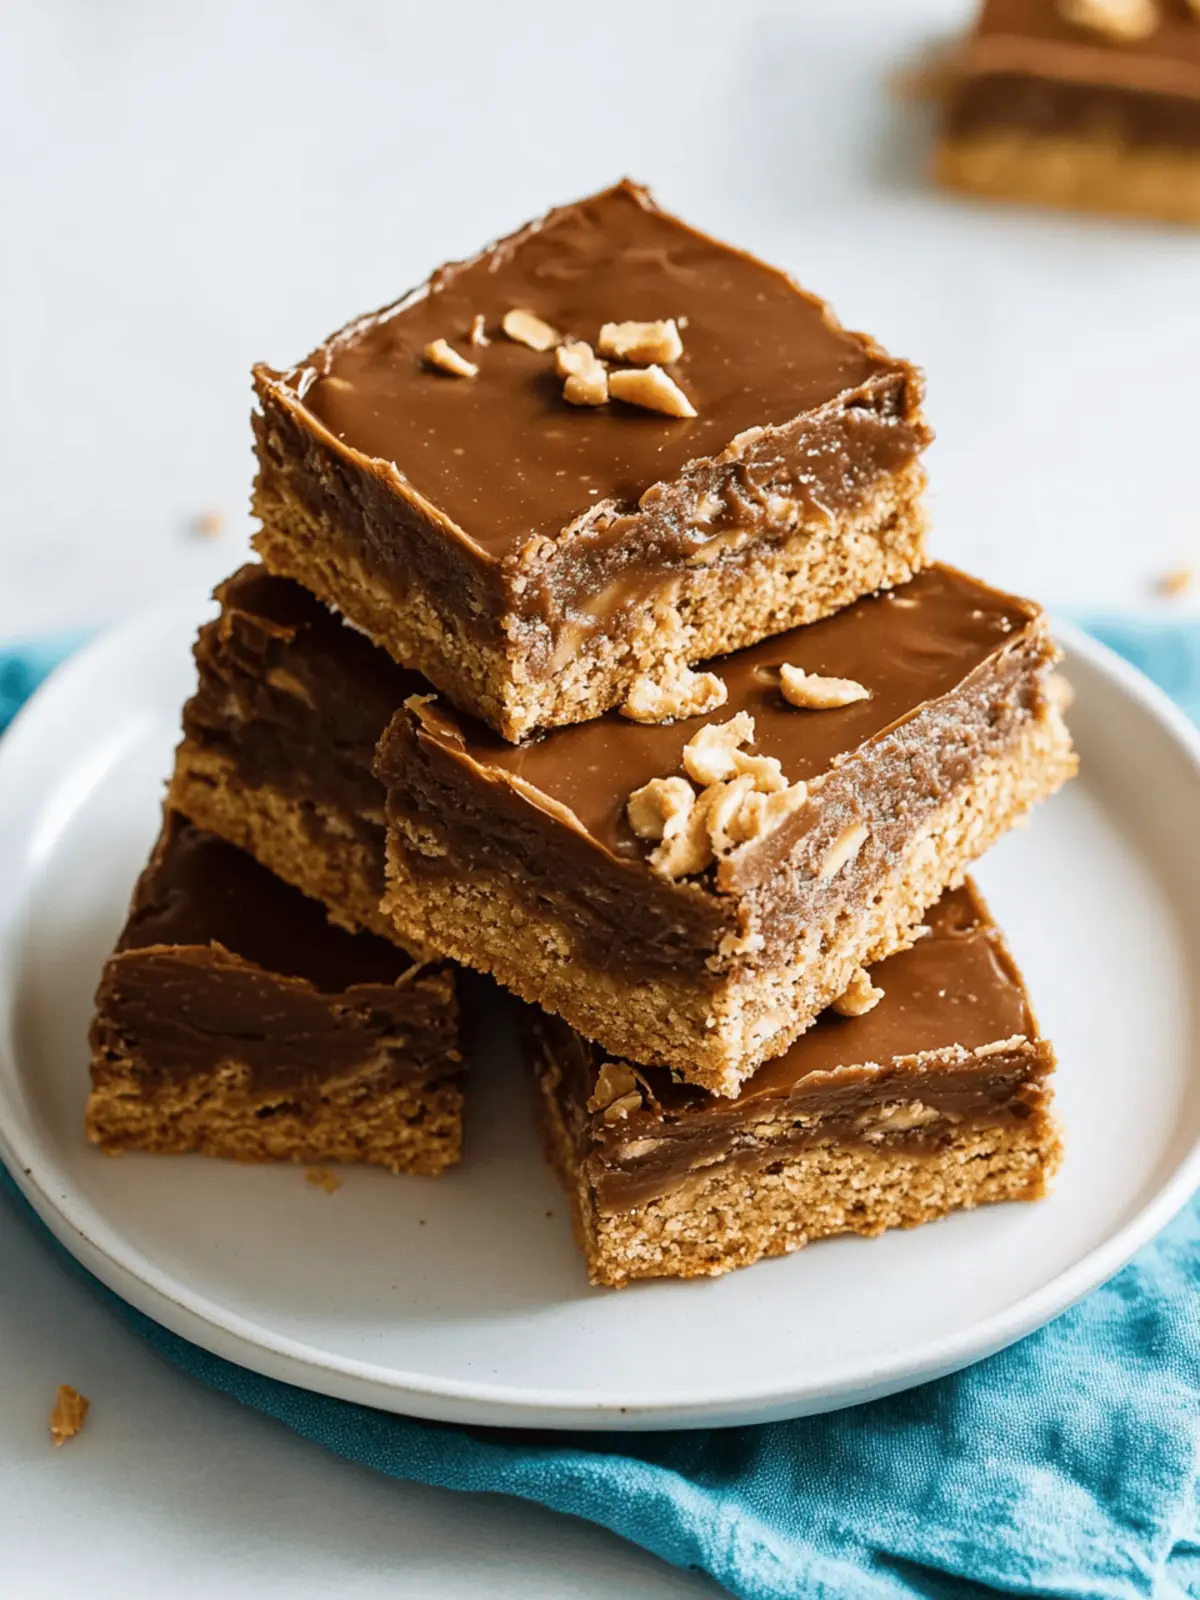
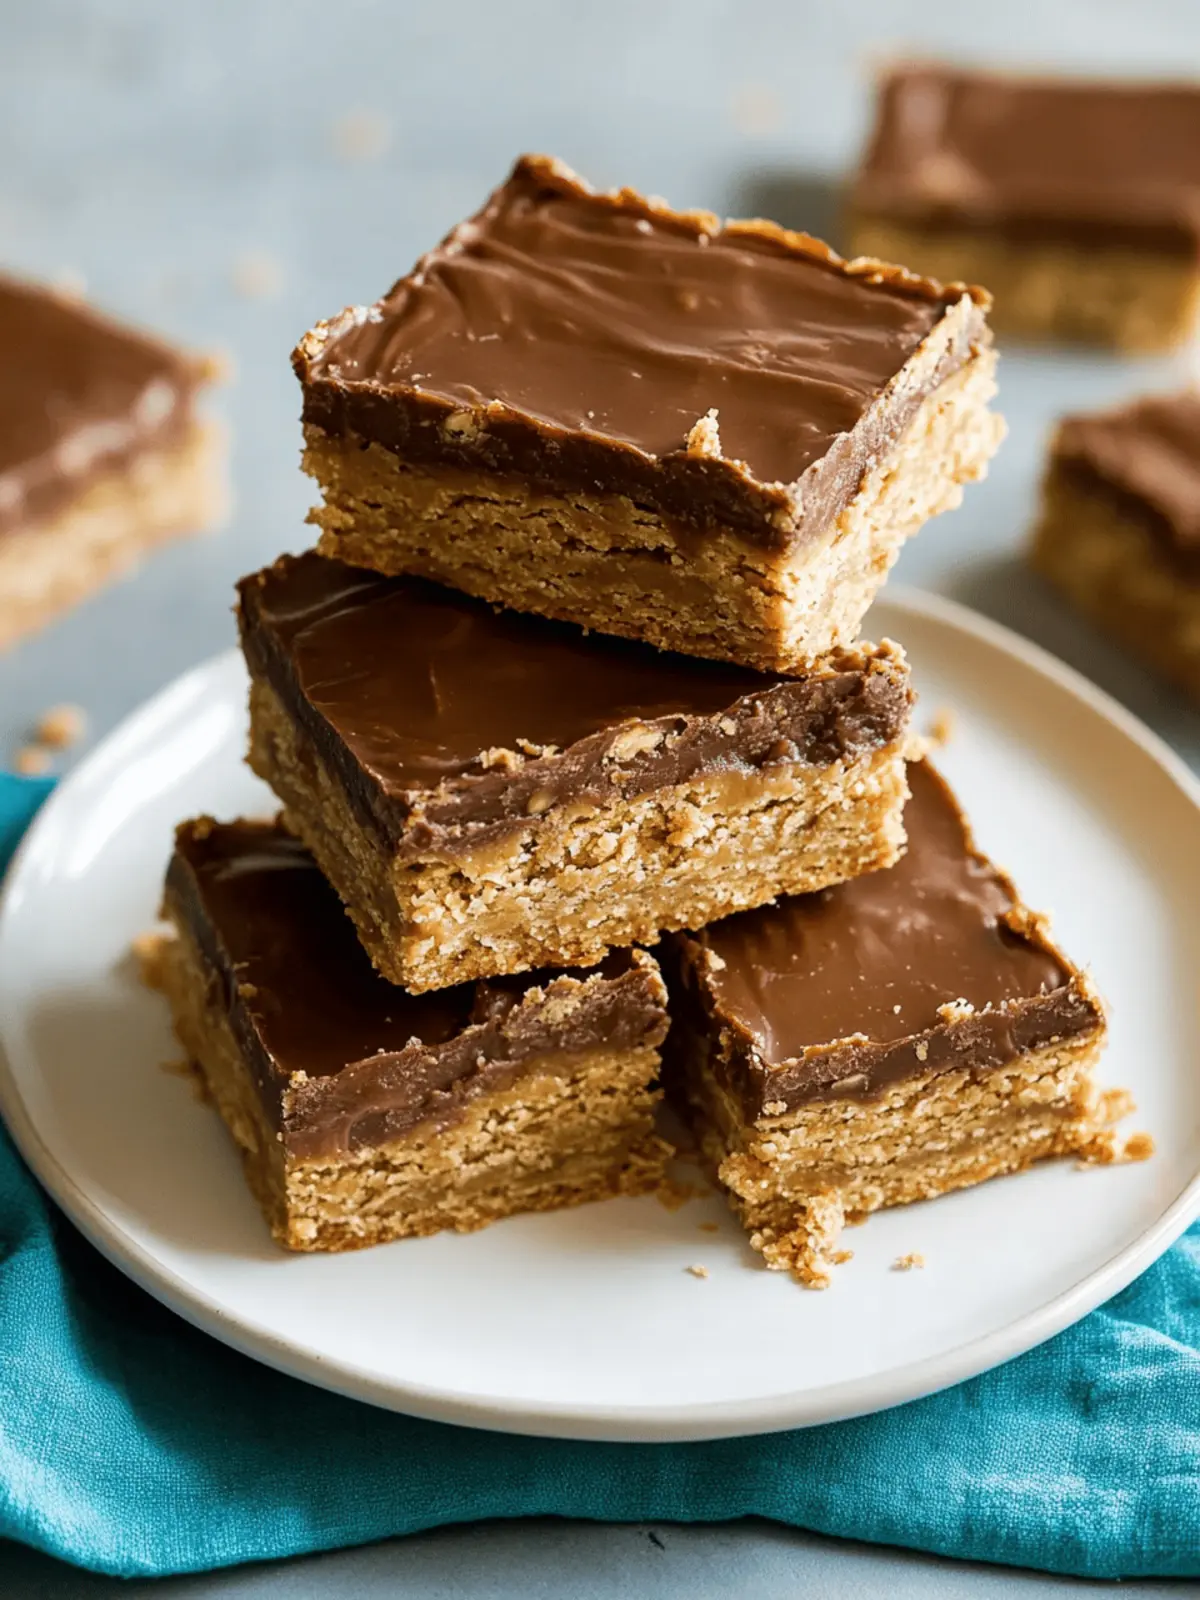
There’s a certain comfort that comes from the smell of these Peanut Butter Bars wafting through the kitchen, instantly transporting me back to carefree childhood days. Picture this: soft, chewy peanut butter oat cookie bars, lovingly topped with a creamy layer of peanut butter and finished with a glaze of rich chocolate frosting. The moment the fork meets this delightful dessert, you’re met with a texture that’s perfectly soft yet satisfying, making them a true crowd-pleaser for both kids and adults alike.
These bars are more than just a nostalgic treat—they’re the answer to your weeknight dessert dilemma! Whether you’re celebrating a special occasion or simply looking to indulge, this recipe strikes the perfect balance between simplicity and indulgence. Ready in under 30 minutes, you can whip up a large batch, ensuring there’s plenty to share (or keep all to yourself). So let’s dive into making these chewy delights that are bound to bring joy to your table!
Why are Peanut Butter Bars so irresistible?
Nostalgic Comfort: These Peanut Butter Bars evoke childhood memories with every bite, taking you back to simpler times.
Easy Preparation: With only a few simple ingredients, you can whip these up in under 30 minutes—perfect for those late-night cravings!
Decadent Layers: The combination of chewy, creamy peanut butter and rich chocolate frosting creates a delightful harmony of flavors and textures.
Crowd-Pleaser: Ideal for gatherings, these bars are sure to impress guests of all ages. Consider pairing them with a scoop of ice cream for an unforgettable dessert experience!
Customizable: Want to switch things up? Add nuts or chocolate chips for extra crunch, or try using almond butter for a new twist!
Peanut Butter Bar Ingredients
For the Base
- All-Purpose Flour – Provides structure to the bars; whole wheat flour can be used for a healthier option.
- Quick Oats – Adds chewiness and texture; old-fashioned oats may alter the texture slightly.
- Baking Soda – Helps the bars rise and become fluffy; no substitutions recommended.
- Salt – Enhances flavor; kosher or sea salt can be used as alternatives.
- Unsalted Butter – Adds richness and moisture; substitute with margarine or coconut oil for a dairy-free version.
- Light-Brown Sugar – Offers sweetness and moisture; dark brown sugar will deepen flavor but change color.
- Granulated Sugar – Contributes sweetness and creates a crisp top; no substitutions recommended.
- Large Eggs – Binds the ingredients together; use a flax egg for a vegan option.
- Creamy Peanut Butter – The main flavor component that adds richness; can be swapped with almond butter for a different twist.
- Vanilla Extract – Enhances sweetness and flavor; no substitutions needed.
For the Frosting
- Powdered Sugar – Adds sweetness and smooth texture; no alternative recommended for desired consistency.
- Unsweetened Cocoa Powder – Provides deep chocolate flavor; ensure it’s unsweetened for the best taste.
- Milk – Adds creaminess to the frosting; non-dairy milk or heavy cream can be used for a different texture.
These Peanut Butter Bars offer a delightful balance of chewy, creamy, and sweet flavors to warm your heart!
How to Make Peanut Butter Bars
Preheat Oven: Set your oven temperature to 350°F (175°C) and prep a rimmed 18 by 13-inch cookie sheet with non-stick spray to avoid any sticking.
Mix Dry Ingredients: In a large mixing bowl, whisk together the flour, oats, baking soda, and salt. This will create a well-rounded base for your bars, enhancing both flavor and texture.
Cream Butter & Sugars: In a stand mixer, combine softened butter, brown sugar, and granulated sugar. Blend together until the mixture is creamy and light, which usually takes about 2-3 minutes.
Add Eggs & Peanut Butter: Crack in the eggs one at a time, mixing well after each addition. Then, blend in your creamy peanut butter and vanilla extract until everything is fully combined and smooth.
Combine Mixtures: Gradually add the dry ingredients to the wet mixture on low speed. Mix just until combined to maintain a tender texture.
Spread Dough: Transfer the thick dough to your prepared cookie sheet, gently spreading it out evenly with a spatula, making sure to reach all corners.
Bake: Place the cookie sheet in your preheated oven and bake for about 13-15 minutes. Your bars should be set but still soft to the touch, not overly browned.
Add Peanut Butter Layer: Once baked, let the bars cool for about 5 minutes. Then, dollop the remaining peanut butter on top and use a spatula to spread it evenly across the surface.
Make Frosting: In a saucepan, melt the butter over medium heat. Whisk in cocoa powder, milk, and salt, bringing it to a gentle boil for about 1 minute. Remove from heat and blend in powdered sugar and vanilla until smooth.
Frost Bars: Pour the warm frosting over the peanut butter layer immediately, spreading it out evenly for full coverage.
Cool & Cut: Allow the frosted bars to cool completely before cutting them into squares. Store them in an airtight container to keep them fresh.
Optional: Serve with a scoop of vanilla ice cream for an indulgent treat!
Exact quantities are listed in the recipe card below.

Make Ahead Options
These Peanut Butter Bars are fantastic for meal prep and can save you time during busy weeks! You can prepare the dough for the bars up to 24 hours in advance by mixing the dry and wet ingredients separately, then refrigerate them until you’re ready to bake. This helps maintain freshness without sacrificing texture. For a quicker assembly, pre-make the frosting and store it in an airtight container in the fridge for up to 3 days. When you’re ready to serve, simply bake the bars as directed, let them cool, and then frost with your pre-prepared icing for quick, delicious results that are just as satisfying as if made fresh!
How to Store and Freeze Peanut Butter Bars
Room Temperature: Keep your Peanut Butter Bars in an airtight container at room temperature for up to 1 week to maintain their chewy texture.
Fridge: For longer freshness, refrigerate the bars in an airtight container for up to 2 weeks. Just be sure to let them come to room temperature before serving for the best flavor.
Freezer: To freeze, wrap individual bars in plastic wrap and then place them in a freezer-safe container. They can be stored for up to 3 months. Thaw at room temperature before enjoying.
Reheating: If you prefer warm Peanut Butter Bars, microwave them for 10-15 seconds to bring back that freshly baked goodness!
Expert Tips for Peanut Butter Bars
- Baking Time: Check for doneness at the 13-minute mark; the bars should be puffed and set, but soft to avoid dryness.
- Cooling First: Allow the baked bars to cool briefly before adding the peanut butter layer. This prevents melting into the bars, ensuring a lovely, spreadable top.
- Frosting Consistency: If the frosting feels overly thick, stir in a tablespoon of hot water to achieve the perfect pourable texture for your Peanut Butter Bars.
- Don’t Overmix: When combining wet and dry ingredients, mix just until incorporated. Overmixing can lead to dense bars rather than the soft, chewy texture you desire.
- Try Variations: Feel free to experiment! Adding crushed nuts or chocolate chips can enhance flavor and provide delightful texture variations in your Peanut Butter Bars.
What to Serve with Peanut Butter Bars?
Indulging in these delightful Peanut Butter Bars opens the door to a world of delicious pairings that can elevate your dessert experience.
Vanilla Ice Cream: The creamy coldness of vanilla ice cream perfectly complements the rich, chewy bars, enhancing their flavors with every bite.
Milk: A classic choice, milk adds a refreshing contrast and nostalgia, making you feel like a kid again with every dunk.
Fresh Berries: The tartness of strawberries or raspberries balances the sweetness of the bars, adding a refreshing burst of flavor to your dessert plate.
Chocolate Sauce: Drizzling warm chocolate sauce over the bars offers an indulgent touch, intensifying the chocolate experience and providing a beautiful presentation.
Hazelnut Spread: A dollop of Nutella or a similar spread adds an extra layer of chocolate and hazelnut richness, creating a divine fusion of flavors.
Coffee: A warm cup of coffee strikes an ideal balance, as the bittersweet notes enhance the creamy peanut butter and chocolate combination in the bars.
Enjoy mixing and matching these pairings to create a truly delightful tasting experience that keeps everyone coming back for more!
Peanut Butter Bars Variations
Dive into a world of endless creativity as you customize these delightful Peanut Butter Bars to suit your taste!
- Nutty Twist: Swap creamy peanut butter with almond butter for a unique and nutty flavor. It’s a delicious alternative that offers a different kind of richness!
- Crunchy Delight: Add 1 cup of chopped nuts or chocolate chips to the dough for extra texture. This will give your bars delightful little surprises with every bite!
- Swirled Perfection: For an artistic touch, mix some of the frosting with the peanut butter layer before spreading to create decadent swirls. This adds both visual appeal and flavor.
- Grain-Free Option: Use almond flour instead of all-purpose flour for a gluten-free version. Your bars will have a light and wonderfully nutty texture.
- Chewy Coconut: Incorporate shredded unsweetened coconut into the dough for a tropical twist. It adds chewiness and a subtle sweetness that pairs beautifully with peanut butter.
- Fruity Surprise: Fold in some dried fruit like cranberries or apricots for a hint of tartness. The sweet and tangy contrast complements the richness of the bars.
- Spicy Kick: Add a pinch of cayenne pepper to the frosting for an unexpected heat that beautifully balances the sweetness. A bold twist for adventurous taste buds!
- Double Chocolate: Replace half of the cocoa powder in the frosting with melted dark chocolate for an indulgent double chocolate experience. Who can resist extra chocolate?
Peanut Butter Bars Recipe FAQs
What type of peanut butter should I use for Peanut Butter Bars?
Absolutely! For the best flavor and texture, I recommend using creamy peanut butter. While you can choose natural peanut butter for a healthier option, be mindful that it may have a slightly different consistency and can result in less creamy bars.
How should I store leftover Peanut Butter Bars?
You can store your Peanut Butter Bars in an airtight container at room temperature for up to 1 week. This helps retain their delightful chewiness. For an even longer shelf life, refrigerate them for up to 2 weeks. Allow them to reach room temperature before serving for optimal taste.
Can I freeze Peanut Butter Bars?
Yes, you can freeze these yummy treats! Wrap each bar individually in plastic wrap and place them in a freezer-safe container. They will stay fresh for up to 3 months. When you’re ready to enjoy, thaw them at room temperature for a perfect afternoon snack.
What should I do if my Peanut Butter Bars turn out too dry?
If you find your bars come out dry, it may have been due to overbaking. Make sure to check them at the 13-minute mark; they should be set but soft to the touch. If they dry out, you can enhance their moisture by drizzling them with a little melted butter or serve them with a scoop of ice cream for added creaminess.
Can I make these Peanut Butter Bars gluten-free?
Certainly! If you’re looking for a gluten-free alternative, substitute the all-purpose flour with a gluten-free flour blend. Make sure to check the oats as well; choose certified gluten-free oats to keep your bars safe for those with gluten sensitivities.
Are Peanut Butter Bars safe for pets?
While peanut butter is often safe for dogs, be cautious! Ensure the peanut butter you use does not contain xylitol, which is harmful to pets. Always consult your veterinarian if you’re unsure about specific ingredients.